
As I mentioned in my Action Adjustment article, adjusting the action on an electric guitar take three basic steps. First, you have to check the relief in the neck and adjust the truss rod accordingly. Second, the action needs to be set at the nut. Third, the action can be set at the bridge. If you have not completed the first two steps, you should go to the how to adjust the truss rod page and the how to set the action at the nut page for details about the first two steps. After you have completed those steps, you will be ready to adjust the action at the bridge.
Styles of Guitar bridges.
Contents
There are many different styles of electric guitar bridges. Each style of bridges functions differently and is set up differently.
Fender Stratocaster/ Telecaster
Gibson Les Paul/ Tune-o-matic
Floyd Rose
Fender Styled bridges.
Fender has made many different styles of bridges throughout the years, although the basic design of the bridges has stayed the same. Each string is strung through the body or bridge and mounted on top of a saddle piece. The saddle pieces can be individually adjusted toward or away from the top of the body as well as toward or away from the fretboard. You will need to adjust the height of the bridge saddles to adjust the action. Most Fender bridges use a 1.5mm allen wrench to raise or lower the individual saddle pieces. Here is step-by-step guide on how to adjust the action on you Fender styled bridge:
- Tune your guitar to pitch.
- Check the back-bow and relief of the neck.
- Adjust the truss rod to straighten the neck.
- Retune your guitar and check the back-bow and relief again.
- Check and adjust the action at the nut.
- Measure the high e string and the low E string at the 12th fret by placing a precision ruler on top of the 12th fret.
- The distance between the bottom of the high e string and the top of the 12th fret should be set to 2/32 inch. If the string is higher or lower than 2/32″, you will need to raise or lower the saddle piece with an allen wrench. To raise the saddle piece, tighten the setscrew. To lower the saddle piece, loosen the setscrew.
- Set the low E string to 3/32″ at the 12th fret by raising or lowering the saddle.
- Place a radius gauge that corresponds to your fretboard radius on the strings. The gauge should be able to sit on the low and high E strings while touching the middle strings. If the middle strings are higher or lower than the gauge, you will need to adjust the strings’ height relative to the outside strings. When the gauge is placed on the two outer strings, the rest of the strings should be touching the gauge but not holding it off of the outer strings. For more detailed information about how to set the radius on your guitar strings, please see the how to set the radius on my guitar string page.
- Finally, retune the guitar and check the action of the outer strings at the 12th fret. If nothing has changed, you are ready to rock. If your strings are still too high, go back and follow the same steps.
For more information about how the Fender styled bridge works, please go to the Fender styled bridge page.
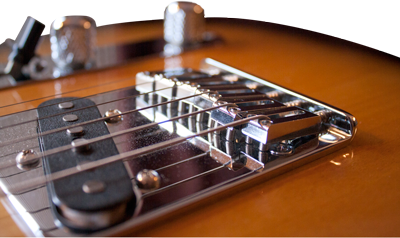
Gibson Style or Tune-o-matic bridges.
The Gibson or Tune-o-matic bridge is much different than the Fender style bridges. The Gibson or Tune-o-matic style bridge has a stoptail and a bridge piece. The stoptail is the piece of the bridge that the strings are strung through and anchored to the body. The bridge is the piece that holds the saddles and intonation pieces. The same principles about saddle movement that apply to the Fender style bridges also apply to the Gibson or Tune-o-matic style bridges. The only difference between the bridges is how you adjust the saddle pieces toward or away from the fretboard. The Gibson or Tune-o-matic style bridges have saddle pieces that are attached to screws threaded through the bridge piece. When the screws are tightened or loosened, the saddle pieces move forward and backward in relationship with the fretboard. The individual saddle pieces cannot be adjusted up or down like the Fender style bridges. The only way to adjust the string height on a Gibson or Tune-o-matic bridge is to adjust the entire bridge up or down. Here are the steps the adjusting the action on a Gibson or Tune-o-matic bridge.
- Tune your guitar to pitch.
- Check the back-bow and relief of the neck.
- Adjust the truss rod to straighten the neck.
- Retune your guitar and check the back-bow and relief again.
- Check and adjust the action at the nut.
- Set the radius of the strings or saddles pieces by filing down the notches in the intonation pieces. For more detailed information about how to set the radius on your guitar strings, please see the how to set the radius on my guitar string page.
- Set the D and G-strings equal in height. Again file down the intonation pieces if necessary.
- Once the D and G-strings are equal in height, the rest of the intonation pieces and strings can be set to the radius gauge. For more detailed information about how to set the radius on your guitar strings, please see the how to set the radius on my guitar string page.
- Once the radius of the strings is set, the action can be adjusted by lowering or raising the entire bridge using either a screwdriver or the thumbscrews on both sides of the bridge. Some bridges like the tune-o-matic style bridge have thumbscrews that can easily be turned to raise and lower the bridge. Other bridges will require a screwdriver to turn the bridge posts in order to raise and lower the bridge. You will need to lower the treble side more than the bass side. The high e should measure 2/32″ and the low E should measure 3/32″ at the 12th fret. The string height measurement is the distance between the top of the 12th fret and the bottom of the string. Since the radius is already set on the rest of the strings, lowering the entire bridge will set the action on all of the strings.
- Finally, retune the guitar and check the action of the outer strings at the 12th fret. If nothing has changed, you are ready to rock. If your strings are still too high, go back and follow the same steps.
For more information about Gibson styled bridges, please go to the Gibson styled bridge page.
Floyd Rose or Floating Bridges.
On a traditional Floyd Rose bridge, the strings are placed inside of the saddles and secured with a setscrew that clamps the string in place. The entire saddle piece is anchored to the bridge with a screw that rides in a slot notched in the saddle. Much like the Gibson style bridges, the Floyd Rose bridge saddle pieces cannot be raised and lowered individually. To adjust the action on a Floyd Rose Bridge, you will have to raise or lower the entire bridge via the two anchor posts that the bridge pivots on. I will run through a few short steps on how to set the action on your Floyd Rose bridge here. In order to get a comprehensive understanding of how the Floyd Rose bridge is supposed to be set up, please visit the Floyd Rose bridge page.
- Tune your guitar to pitch.
- Check the back-bow and relief of the neck.
- Adjust the truss rod to straighten the neck.
- Retune your guitar and check the back-bow and relief again.
- Check and adjust the action at the nut.
- Set the radius of the saddle pieces and strings by grinding or sanding away the saddle pieces from the bottom. For more detailed information about how to set the radius on your guitar strings, please see the how to set the radius on my guitar string page.
- Set the D and G-strings equal in height. Again grind down the saddle pieces if necessary.
- Once the D and G-strings are equal in height, the rest of the saddle pieces and strings can be set to the radius gauge.
- Once the radius of the strings is set, the action can be adjusted by raising or lowering the bridge. Use an allen wrench or screwdriver, which ever your bridge posts are made for, to raise or lower the bridge posts. Turn the posts to the right to lower the bridge or turn them to the left to raise it. You will need to lower the bridge until the high e measures 2/32″ and the low E measures 3/32″ at the 12th fret. The string height measurement is the distance between the top of the 12th fret and the bottom of the string. Since the radius is already set on the rest of the strings, lowering the entire bridge will set the action on all of the strings.
- On a fulcrum bridge, you have to be able to pull the tremolo arm back far enough to raise the pitch one full step.
- Finally, retune the guitar and check the action of the outer strings at the 12th fret. If nothing has changed, you are ready to rock. If your strings are still too high, go back and follow the same steps.
For more information about how to set up a floating or Floyd Rose bridge, please go to the floating or Floyd Rose bridge page.
These are the basic steps to setting the action on various styled electric guitar bridges. Please visit the individual guitar bridge pages for more detailed information about the anatomy of the bridges themselves.
Remember, guitar action is left up to personal preference; everyone likes their guitars setup slightly differently. These are just industry standard measurements and settings. This action setup should get you in the ballpark of where you are comfortable. It is up to you to fine-tune your setup exactly how you want it.
