
Electric guitar strap buttons come in two basic kinds: non-locking and locking. Almost every electric guitar made today comes with non-locking strap buttons. The only difference between locking and non-locking strap buttons is the locking strap button consists of two parts: one that attaches to the guitar and one that attaches to the guitar strap.
Once the two pieces are connected together, the guitar strap cannot be slip off the strap button. It is “locked” in place. Strap locks are nice if you place a lot of shows and don’t want your guitar falling off your shoulder. Otherwise, regular strap buttons work just fine. In this article, I will show you have to install strap buttons on your electric guitar as well as how to fix loose strap buttons.
How to Install Electric Guitar Strap Buttons.
Contents
At first it might seem like installing strap buttons is easy and there is nothing to it. Well, it is not a difficult job, but you have to be careful and pay attention to detail. Whenever you are drilling into your guitar body, you want to make sure that everything is perfect. Once you drill the wrong hole or in the right hole in the wrong place, you will be working more on fixing the problem then doing the original installation. It is important to do it right the first time.
How to Choose the Right Strap Button.
Non-locking Strap Buttons.
Most electric guitar strap buttons are almost identical. Except for colors and plating, pretty much all non-locking strap buttons are the same. Some have a slightly larger lip on the end to hold the strap better, while others are made to be streamline and thin. Personally, I like the larger strap buttons to ensure my straps won’t come off easily.
Locking Strap Buttons
As I stated earlier, locking strap buttons make it almost impossible for your strap to come off your guitar. I would advise these for people who play shows a lot. For the average guitarist who plays in his home, strap locks are a little excessive. No matter what strap buttons you choose, installation will be the same.
Choose the Location.
Tape off Strap Button Area, Measure, and Mark.
This is where the installation get tricky. It is not as easy as just drilling a hole where you think it should be. First, let’s we need to map out the perfect spot for your strap button. I like to tape off the area where I am going to drill the hole with masking tape. This gives me a surface that I can write on. So take a few pieces of painter’s tape or scotch tape and put it on the guitar.
Picking a Location on the Bout.
If you are installing the button on the bout of the guitar, you will want it to be directly in the center of the guitar. You can take a ruler, line it up with the middle of your bridge, let it hang off the bout of the guitar, and draw a line on the tape that you put on the bout. This will mark your centerline. Next, measure the thickness of your body, divide that number by two, and draw a line right across the center. Now you have crosshairs where your button will go. Take an awl and press a dot/mark in the body where the crosshairs are. Make sure the impression in the body is big and deep enough to pick up with a drill.
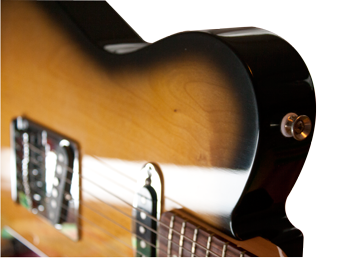
Picking a Location on the Horn.
If you are installing the strap button on the horn, you may also want to tape off the area. It is especially important to look at the setting of this button carefully. You want the button to be slightly angled toward the neck of the guitar on Fender and Les Paul styled guitars. If your strap button is angled away from your neck, the strap will slide off the button because there will be nothing for the strap to catch and grab onto. You also don’t want your strap button to be too severely angled because the opposite can happen: the strap is bent so far forward that it twists and pulls off the button. Obviously, SG style guitars and odd shaped guitars will not have to worry about this because the strap button in mounted on the back on the body. On these guitars, you will need to make sure that your strap button screw will not hit anything inside the guitar i.e. wiring, pickups, pots. So taking that into consideration, draw a centerline on the tape and mark a spot where the strap button is slightly angled toward the neck. Take an awl and press a dot/mark in the body where the crosshairs are. Make sure the impression in the body is big and deep enough to pick up with a drill.
Bevel and Drill the Hole.
Now that the hole is laid out and marked with a dot from the awl, you can remove the tape. I like to take a countersink bit and slightly bevel the dot from the awl. This will prevent the finish from cracking or chipping when we drill the hole. Next, let’s decide what drill we want to use. Some people use a tapered drill bit, but it is not necessary. Take a pair of calipers and measure the pole of the strap button screw (not the threads of the screw). You will want to drill a hole slightly bigger than the pole of the screw. This way the threads will grip the wood tightly, but the screw will not crack the wood.
Next, measure the amount of the strap button screw that will be screwed into the guitar and transfer that measurement onto your drill bit. You can either mark the drill bit with a Sharpie marker or tape off the bit. This will ensure that you do not drill too far into your guitar. After all, you want your strap button to be tight and secure–not loose.
Now secure your guitar to a table, workbench, or vise. Line the drill up to the awl mark and drill the hole. Make sure to drill a square hole. It sounds funny, but it is pretty easy to drill into your guitar at angle. Make sure your drill in perpendicular to your body when you are drilling the hole. Remember, you only get one shot at this. Drill the hole right the first time.
Wax and Screw in the Strap Button
It is pretty common in woodworking to use hardened wax to lubricate screws when going into tight holes. Take a small amount of wax and spread it over the strap button screw. The wax will lubricate the screw and help prevent wood cracks. The screw should screw in firmly. If it is loose, you probably drilled the hole too large and may some more work to do. Don’t force the screw if it is extremely tight. You may crack the wood. Just screw it down until the strap button is secure. There you go! That’s all there was to it. Now you can jam with your sweet new strap buttons.
How to Fix Loose Strap Buttons.
Loose straps buttons can be a serious issue. Strap buttons can pop out and cause your guitar to fall on the ground denting or even breaking it. Many Gibson guitars have problems with their headstock angle. When dropped on the ground the wrong way, POW, the headstock breaks clean off–not too cool, especially if it was caused by something as small as a loose strap button. Needless to say, it is important to have secure strap buttons. There are two main cases of loose strap buttons: a little loose and severely loose.
How to Fix a Slightly Loose Strap Button.
A slightly loose strap button can be turned and wiggled around in place. This is caused because screw in the guitar is starting to strip the threads in the guitar body. It may still be secure enough to hold the weight of your guitar without popping out, but it is not very stable. A slightly loose strap button will still grip the guitar enough that it can’t be pulled out easily. Believe it or not, this is a pretty good sign. It means you haven’t stripped the threads completely. The hole for the strap button screw hole has just expanded due to the movement of the wiggling strap button screw.
There are two good ways to fix a slightly loose strap button.
Use a Toothpick.
I know it sounds funny, but a toothpick can actually fix your strap button problem. Simply, unscrew your strap button screw. While the screw is out of its hole, place a thin toothpick in the hole. Now carefully screw the strap button back on. The toothpick gives the screw something new to grab onto and thread in the hole. Do not glue the toothpick in place or EVER glue the strap button screw in the hole. This can cause major problems down the road if you ever want to get your strap button off. You could crack your guitar or even break off the screw inside your guitar. Not good.
Make the Screw Hole Smaller.
I know I just told you not to use glue, but in this case it is ok. Take some super glue on a small brush or Q-tip and lightly brush it on the inside of the strap button hole. I like to use Satellite City Super Glue. Let the glue dry and repeat. Give it a couple coats. The hardened glue will create more material on the inside of the hole for the screw to grab onto. Remember, you don’t want to have to force the screw in place, so don’t build up the glue too much on the inside of the hole. If you do put too much glue in the hole, you may have to redrill the hole. Also, remember what I said earlier. Don’t glue the screw in the hole. Make sure the glue is dry and hardened before you even think about screwing in the strap button.
How to Fix an Extremely Loose Strap Button.
An extremely loose strap button has already stripped the threads holding the screw in the guitar. The strap button can easily be pulled in and out of the guitar. Please do not continue to use your strap button like this. You are just asking for your guitar to fall on the ground and break. Since the threads are completely stripped out and the hole is too big for the screw, you will either need to get a bigger screw that can thread into the stripped out hole or plug the hole and start over. Since bigger screws will not always fit in your strap button, most likely you will have to plug the hole and start over.
First, take your strap button out of the hole.
Second, get a dowel that fits in the left by the screw. You can fit the dowel to the hole and cut off and excess material.
Third, you can glue the dowel in place with wood glue. Do not use super glue, as it tends to run and is difficult to wipe up excess. Wood glue can easily be cleaned off the finish of your guitar. I like to use Tite Bond wood glue . Let the glue dry and harden. Then you can sand down the end of the dowel until it is flush with edge of the body. Now you have a solid body that you can drill into again. For the rest of the installation process, follow the How to Install Electric Guitar Strap Buttons article at the top of this article.
Now your strap buttons are on securely and your guitar is already to rock! For more information about what kinds of glue to buy, please see my glue page.

thanks for the advice!