Styles of Electric Guitar Nuts
Contents
Electric nut materials
Electric guitars have many different styles of nuts made from many different types of materials. Nuts can be made out of bone, ivory, tusk, wood, metal, corian, Tusq, plastic and other synthetic materials. All of these materials will work for an electric guitar nut, some better than others. A “good” nut that produces “good” tone should be made of extremely dense material. Some of these materials are denser and better suited for nuts than others. It is important to know what kind of material your nut is made out of when you are planning to work on it. Each one of these materials is slightly different to work with. You will not need to add any material back on if all you are doing is lowering the action at the nut; however, in other repairs, it may be necessary to add material. You will want to match whatever material you are adding with the existing nut material.
Fender styled nuts
Fender makes guitars with every style of nut imaginable. The “classic” Fender nut on most Stratocasters and Telecasters will probably have a straight nut made out of bone, horn, or synthetic material glued in a slot on the fretboard. These nuts are called inlayed nuts. A slot is routed a short distance from the edge of the fretboard and the nut is fitted and glued into the slot. The nut is then laid out for the string placement and notches are filed into it for the strings.
Gibson styled nuts
Most Gibson electric guitars made today have synthetic nuts like corian, but older Gibsons could have bone or other material nuts. Unlike the Fender style inlayed nuts, Gibson traditionally made a nut similar to an acoustic guitar’s nut on their Les Pauls and SGs. This style of nut is not inlayed in a slot in the fretboard. Rather, it is made thicker and taller than the inlayed nuts and butted up against the edge of the fretboard. The nut itself is glued to the neck–not the fretboard. These nuts are fitted to the neck and then glued in place. Once the nut is glued to the neck, it can be shaped and notched for strings.
Floyd Rose locking nuts
The Floyd Rose style of nut has become popular ever since Floyd Rose invented his revolutionary floating bridge in the late 1970s. The locking nut accompanied the Floyd Rose bridge to help keep a guitar in tune with a changes of the Floyd Rose bridge. Locking nuts are made of metal and have places for a lock to be bolted into the nut. The lock bolts into the nut and sandwiches the strings between the lock and the nut. This keeps the strings from shifting in the nut during huge dive bombs with the wammy bar. The strings generally stay in tune with the locking nut during wammy usage. The major drawback to the locking nut is that once the locks are tightened, you can no long change the tuning with the tuners. You must use the fine tuners on Floyd Rose bridge. Nonetheless, the locking nut get does its job.
Fender Roller Nuts
The Fender Roller nut is a unique innovation. The nut has balls on the inside of each string notch. The balls guide the strings through the notch and allow the strings to roll on the balls. This design helps prevent the string from getting stuck in the string notch when you are tuning the guitar. On a traditional Fender nut, if the string notches in the nut are too narrow, the string can get wedged in place. When the string is brought up to pitch, the string will get stuck until the tension is great enough to force the string through the narrow notch. The string then skips and will probably have to be retuned again. The Fender Roller nut is aimed at fixing this problem by eliminating tension between the string and the nut. The string can easily slide through the string notches on top of the ball bearings.
How to Repair Broken Electric Guitar Nuts
This section coming soon.
How to set up an Electric Guitar Nut
Setting up an electric guitar nut usually means lowering or adjusting the action on the nut. This is fairly simple to do. I wrote an entire article on how to lower the action on your electric guitar nut. For more information, go to the action adjustment page.
How to remove an Electric Guitar Nut
Bone, wood, and plastic nuts can chip or break over time. Many people accidentally drop their guitars and part of the nut just snaps right off. In this case, you will want to remove your guitar nut and install a new one. Removing each style of nut is slightly different. I’ll explain the process for most of them.
Score the Edges of the Nut
Before we start pulling nuts out of guitars, you should look at the finish on the neck of your guitar. If you neck is finished, you will want to score the edges of the nut with an X-acto knife. Scoring the edges of the nut will break the finish and prevent it from chipping as you pull or slide the nut out of its slot.
How to Remove a Fender Inlayed Guitar Nut
Most Fender Stratocaster and Telecasters have inlayed nuts. These nuts are glued into a notch or channel that is routed into the fretboard.
The Slide Method
As will all guitar repairs, there are multiple ways to remove this style of nut, but the most common is to slide it out. After you have scored the edges of the fret, if necessary, place a caul or flat end of a file against one edge of the nut and tap it out with a hammer. You shouldn’t have to hit the nut very hard. Remember you are not trying to break the nut. You just want to slide it out of place. I prefer removing Fender nuts this way because it is far less risky than the alternative.
The Pull Method
If you cannot slide the nut out of the channel, you can use your fret nippers or vice grips to pull the nut out. Be very careful if you are doing this. I suggest placing protective tape or metal stripping on both sides of the nut, so you don’t damage the fretboard or headstock. This method is not preferred to the first one because it can result in chipping the fretboard.
The Cut Method
If glue is too strong and you can’t get the nut out of its slot, you can always just cut it out. This is obviously the least desirable method because you destroy the nut. Simply take a fret slot saw or other thin saw and cut the nut right down the middle. Be careful, you don’t want to cut into the fretboard. This will take the middle out of the fret, so you can break the sides off the fretboard and collapse it on itself.
How to Remove a Gibson Les Paul Guitar Nut
Gibson guitar nuts are much easier to remove than Fender nuts, at least most of the time. Gibson nuts are usually very similar to acoustic guitar nuts. Les Paul nuts are glued on the wrist of the headstock and butted up against the end of the fretboard. These style nuts can easily be removed. Simply take a flat block of wood and lay it flat on the fretboard butted up against the nut and tapping it with a hammer. The nut will break right off. Remember, you have to score the edges of the nut otherwise it will probably chip your finish.
How to Remove a Floyd Rose Locking Nut or Roller Nut
The Floyd Rose nut and Fender Roller nut are the easiest nuts to remove. All you have to do is remove the strings from the guitar and unscrew the bolts in the nut with a screwdriver–very simple.
How to Make an Electric Guitar Nut
Making an electric guitar nut is pretty simple, but if you don’t want to go through the trouble of making a guitar nut you can buy one that is pre-slotted. I have several different styles of pre-slotted nuts available on the side of the page, or you can go to the nut supplies page. If you still want to try your hand at making your own guitar nut, I have written an entire article about how to make one on my how to make an electric guitar nut page.
How to Install an Electric Guitar Nut
Clean the Fret Slot and Fit the Nut
After you have bought or made your electric guitar nut, you can fit it to the slot. Most of the time there is usually some glue left over in the slot from when you removed it. You will need a fret seating file or thin bastard file to file down the glue or debri in the slot. Be careful while you file the slot down. It must be straight, so don’t take too much material off any one side. Once the slot is clean, you can set the nut in place. Fender inlayed nuts should fit snug in the channel and Gibson nuts should sit flat against the fretboard. Both styles of nuts should not hang out over either side of the fretboard. If it does, you will need to file down the edges until it is smooth.
Dry Run
Always, always, always do a dry run before you glue anything on the guitar. Set the nut in place and figure out how you are going to clamp it down while you glue. After you have everything set, we can get ready to glue it in place.
How to Glue an Electric Guitar Nut in Place
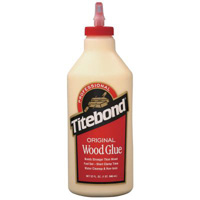
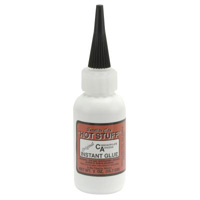
After you finish your dry run, you are ready for gluing. I suggest using either Tite Bond wood glue or Satellite City Super Glue. Both work fine. Obviously, the super glue will not need to be clamped in place because of the quick drying time. All you need to do is put a small dab of glue in the middle of the slot and insert the nut. Make sure to press the nut all the way into the slot. You don’t want it to be glued half in the air. Also, check both sides of the nut. Neither side should be sticking off the edge of the fretboard. I only suggest using a little glue because it doesn’t take that much. The pressure from the strings holds the nut in place. The glue makes sure the nut doesn’t fall out when the strings aren’t on the guitar. You don’t want to permanently glue this thing on the guitar either. You may have to remove it one day and you want it to be easy. Also, if you use too much glue, squeeze out will drip down and around the neck. You will have to quickly wipe this up before it hardens. If you use super, you can spray accelerator on the nut seems, hold it for a few seconds, and you are done. If you use wood glue, you might consider clamping it in place, so the glue can dry for a few hours.
$8.99
$10.99
$8.99
How to Install Floyd Rose Locking Tuners and Fender Roller Nuts
Installing these nuts is quite simple. You will need to clean the slot just like with the other style nuts. After the nut slot is clean, you can place the nut in the slot. Take a caul and mark where the screws holes need to be. Now remove the nut and drill a slightly thinner than the width of the screw and slightly shallower than the length of the screw. Now all you have to do is put the nut back in place and screw it down. It’s as easy as that. Now you can go check out some Online Metal Guitar Lessons.


