
There are many steps to properly setup on an electric guitar. I’ve talked about all of these topics on other pages. I just wanted to write this short summary, so you can see all steps to completely setting up your electric guitar. A standard guitar setup usually includes adjustments for action, intonation, and string buzzing. Other repairs, like fret dressing, are not generally included in an “standard” electric guitar setup.
Now let’s get started!
Step 1: Change Your Guitar Strings
Contents
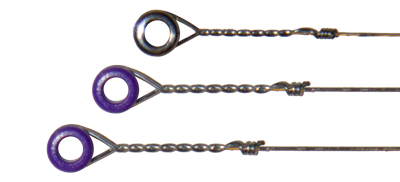 This is the first crucial step to making your guitar play great. So much can change on a guitar just by changing strings. Old strings can go dead and produce poor intonation. It is important to start any guitar setup with a new set of strings. These stings don’t have to be the same. You can change string gauges or sizes before you setup your guitar. New string gauges will just pull on the neck and bridge differently, so it will take more work to set it up. But isn’t that what we are doing? 🙂 We are setting up your guitar the right way. Pick any string gauge you want!
The next step is to tune your guitar. Always, always, always tune your guitar to pitch before adjusting anything. Notice that I did not say, “tune your guitar to standard pitch.” You should setup your guitar up to play properly in the tuning that you normally play in. This could be standard tuning, drop d tuning, or even DADGAD tuning. Who knows.
Step 2: Straighten your guitar neck
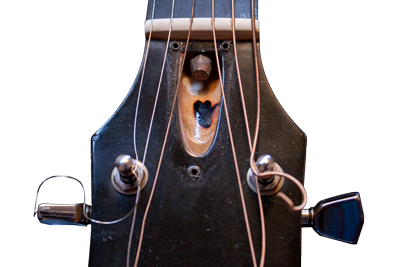 It is important to straighten your guitar neck before you do any action adjustments or intonation adjustments, because your neck’s straightness directly affects every other adjustment. If your guitar neck isn’t straight, most likely you won’t be able to find tune any other part of this setup. Plus, you don’t want to go through all the trouble of lowering the action and setting the intonation just to have it get messed up when you find out your guitar neck isn’t straight.
You will need to tighten or loosen your guitar’s truss rod to adjust the straightness of the neck. Here is an entire article I wrote about adjusting your truss rod.
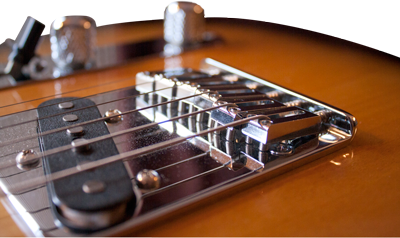
Step 3: Set your guitar’s string radius
Before the action and intonation can be set, the strings need to be set to the same radius as the fretboard. Almost all electric guitar bridges have string radius adjustment screws on them. This adjustment will vary depending on what guitar you have and which bridge your electric guitar has. Some bridges, such as the Floyd Rose bridge, are more time consuming to set the radius of the strings. My string radius adjustment page goes through the steps how to set the string radius on every electric guitar bridge. Check it out!
Step 4: Adjust your guitar’s action
 Guitar action or string action is the height of the strings above the fretboard. Depending on your playing style, you may want to set the action higher or lower in relation to the fretboard. A guitar with higher action will be more difficult to play than a guitar with lower action, but higher action will give the strings more room to vibrate. Whereas, a guitar with lower action will be easier to play than a guitar with higher action, but the strings won’t have as much room to vibrate. This can be the difference between a guitar with long sustain and one with horrible sustain. Excessive low action can also cause string buzzing. Setting the action on an electric guitar may require adjusting both the bridge and the nut. For a complete action adjustment guide on how to lower the action on any electric guitar, check out my action adjustment page.
Step 5: Set your guitar’s intonation
 Intonation is the relative tuning of your guitar as your play up the fretboard. To put it simply, intonation can make your guitar sound really good or reallly horrible. Without having your guitar properly intonated, chords and solos played higher on the fretboard will sound out of tune while open chords sound in tune. Basically, it will be impossible to tune your guitar. Intonation is usually set at the 12th fret or one octave from the open strings. I have an entire article about how to adjust the guitar intonation on every type of electric guitar. Check it out.
That’s It. You’re Done!
That is it! That is all there is to it. Those are the five steps to professionally setting up your electric guitar. Now there is no need to go down to your local music shop and fork over $50-$100 to have some guitar tech do it for you. You can follow this simple approach for everyone one of your electric guitars. It might be time to check out some online guitar lessons to learn how to shred!

Wow! We all seem to want to take the best care of those things we care most about, but we do need to know how to do so. With this manual, now I can let my guitar know how much I love her because even I can follow these great instructions. Very well written instructions that are a great service to guitar players everywhere. Thanks. Alissa thanks you too.
Wouldn’t I tune it AFTER straightening the neck? I can’t turn the truss rod with the tight strings in the way. Don’t wanna snap my new strings either. I loosen, straighten..and then tune.