
 Cutting the body thickness
Contents
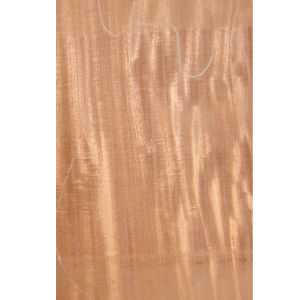
My piece of Honduras Mahogany was approximately 2 inches thick. According to my guitar body plans, I need to trim the mahogany down to 1.25 inches thick. Since .75 inches is a considerable amount of scrap, I wanted to cut it out and keep the .75 inch sheet for another project. To cut body down to thickness, I set up a fence on the band saw that would scale the entire height of the piece of mahogany. I made sure to cut the body slightly larger than 1.25 inches, so I had enough material to level the wood and maintain a 1.25 inch finish thickness.
Planing and Leveling the body back
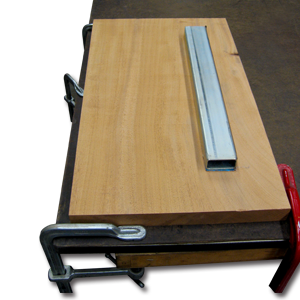
The body must be flat and level before you can glue it together. The best time to plane the body is before it is cut out because then you don’t have to deal with the curves of the body. I could have just used my planer to plane the guitar body, but I wanted to show you how to plane you guitar without an expensive planer.
I used one of my leveling bars to plane this guitar back. This technique is just as effective as a planer but less costly and efficient. I simply clamped the guitar body blank to my workbench and covered the top of the body blank with pencil lines. Next, I put 80 grit sand paper on my 24″ leveling bar and sanded the top until the pencil lines disappeared. I blew off the body blank and repeated this sanding process a few times on both sides of the body until the leveling bar was hitting all parts of the guitar body at the same time. During this entire process, I was checking the body with a caliper to make sure I was sanding evenly.
Cutting out the Guitar Body
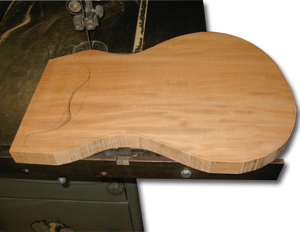 There are several ways to cut out your guitar body, but I chose to use a band saw. First, I used my template to draw an outline of the guitar body on the piece of wood. Once the guitar outline was on the wood, I used a band saw to cut approximately an 1/8-inch outside of the guitar outline. I cut on the outside of the line, so I could come back in with my router and trim the body down to the perfect size.
Routing out the Guitar Body
After my guitar body was cut an 1/8-inch oversized, I attached my template to the guitar body blank with double stick tape. This ensured that my guitar body was trimmed out perfectly. I simply placed my guitar body flat on the table with the template side facing up, so the template would catch the router bearing. I routed out the body in a clockwise direction to rough in the template shape. Then I carefully routed the body in the opposite direction to trim it perfectly to size.
Router Setup
Since I don’t have a designated table router, I set my hand router up inside my workbench to turn it into a table router. I simply screwed my plunge router to a piece of wood and turned it upside down in a specially designed cavity of my workbench. This way the router bit is the only thing above the table surface.
Router Bits
I used a flush cutting router bit to route out the body. This bit has a bearing on the top of the bit that is the same size as the router bit’s blade. The bearing rides along the template while the router blades cut the body to the exact shape of the template.
![]()
Sanding the Body
After I removed the template and the double stick tape, I sanded the edges of the body with 80 grit sand paper to get rid of any inconsistencies from the routing process.
On to the Building Phase!
Now that the body is completely routed out and sanded, it is ready to route out the body cavities.