
When you think of building a workshop, what comes to mind first? A workbench, tools, lights? That’s what most people think about, but before all of that can be built or installed you have to think about the most used part in your workshop–the floor. This might sound kind of crazy. When I told people I was finishing the floor before I put anything else in there, they said, “It’s a workshop. You’re not building a luxury showroom.” The truth is the floor is the most used part of the shop. Not only will I be walking on and looking at it all the time, I will also have to clean it regularly. If you are like me, you like a clean workspace. Sweeping up saw dust and woodchips on old concrete could be a big pain. They always stick to the ground and I don’t want to get a shop vac out every single day to clean the floor.
That’s where the epoxy floor finish comes in. This stuff creates a smooth, hard finish on top of the concrete. None of the dust or chips can stick to the epoxy. It is so much easier to clean up. Plus, it looks awesome. It makes your shop looked like a finished workspace.
Ok enough of me ranting about how much I love finished floors. It’s time to get started.
Here’s What I Used
Contents
There are tons of different kinds of epoxy coatings for home use out there. I decided to go with the Rust-Oleum epoxy kit . I like Rust-Oleum as a brand and have used their paints for a long time. Plus, the two-gallon set was far cheaper than other ones I found online. The Rust-Oleum set was about $100, which is a great deal compared to some that, I found for over $300. The kit came with one gallon of epoxy, one gallon of avitator, and decorative chips. I also got a pack of Concrete Etch. This is a great idea to use. It helps clean the concrete, so the epoxy will stick better and prevent peeling in the future.
Plus, it’s only $15–well worth it. I decided to go with red epoxy, but Rust-Oleum makes a few different colors. I am very happy with the way this came out. I would like recommend the Rust-Oleum set if you are planning on coating your workshop or garage floor. I also used a rough bristled brush, a bucket, and a paint roller. Here’s what I used.
Cleaning the Floor
Before you can do anything, you have to make sure that the floor is extremely clean. Just like finishing a guitar, the prep work is the most important. No dirt, dust, and especially no oil. The epoxy won’t stick very well to a surface that isn’t clean. It will just peel away like chipping paint. Trust me. You don’t want to be in this situation. Wire brushing and sanding the peeling epoxy is not fun. Here’s how I cleaned my floor.
First, I swept the floor thoroughly and then vacuumed it with a shop vac. That got pretty much all the loose dust and dirt off the floor. Then I mopped the floor and wow! I thought the floor was pretty clean after I swept and mopped it–not even close. The water turned brown. Since I was in the basement, I had to be careful about my water usage. In other words, I couldn’t just bring a hose down there and hose the cement off. I had to mop the floor one bucket at a time. I used a mop as well as a stiff bristled broom to loosen up the dirt and scrub the floor. Then I’d vacuum all the dirty water up with the wet/dry vac. It was a bit of a pain but well worth it. If you are finishing the floor in your garage, you could just use a power or pressure washer. Just spray all the dirt right out the garage door! That’s so much easier than trying to mop it!
Finally, after a few different times mopping the floor, my water bucket would remain clear. By then I knew the floor was clean. There was however some oil spots on the floor around the oil tank. Some of you might have to deal with this in a garage too. I just poured some mineral spirits on the ground and washed the spot with a rag. Then I poured some cat litter over the spots. The litter helped soak up the oil and the mineral spirits helped clean the cement. I did this a few times too.
Acid Washing the Floor
At first, I wasn’t really sure that I needed to buy another $15 pack to finish the floor, so I started reading some forums. Everyone was saying to use it. Now that I am done with the project, I agree. Do everything you can to completely clean the floor before you put the epoxy down. You don’t want to do this project twice.
The acid wash is really simple and safe to use. Essentially, it’s just citric acid. It won’t hurt you if you touch it with your bare skin. I just mixed up the pack of acid with a bucket of water and used it to mop the floor one more time. It was really cool listening to the acid. It was almost like hearing a soda in a glass. I could hear it crackling and reacting! After I let the acid work for a few minutes, I washed it off the floor and let the cement dry overnight.
Epoxying the Floor
Now that the prep is done, it’s finally time to coat the floor. The epoxy comes in two gallons. One gallon is the epoxy and the other is the activator. I poured the epoxy and activator into a 5-gallon bucket and stirred it for about 10 minutes. Then I left it sit for another 30 mins to fully activate. Check out the instructions on the box for the activation times for your temperature and humidity.
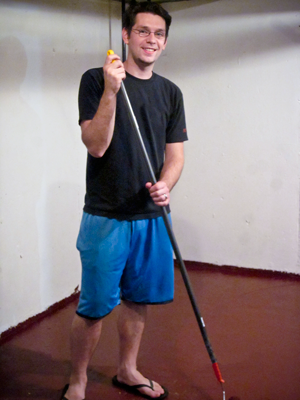
After I came back downstairs, the epoxy was ready to go. I know; I could smell it! Even though they say this has “low odor” it still off gases a lot. Make sure you can open windows and get good ventilation. Before I started rolling the main part of the room, I took a paintbrush and went around the perimeter of the room. I hand painted about 6 inches away from the wall. That way I could come in with the roller and get the rest. Make sure you do this first. If you start in the middle of the room, you might not be able to make it to the corners because you can’t step on the epoxy once it’s on the floor.
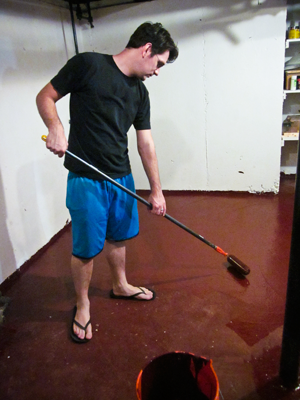
After the corners were done, I poured some epoxy into a paint tray and used a paint roller on a poll to roll the epoxy on the floor. This was great because I didn’t have to bend over and I didn’t have to lug the big bucket all around the room.
Rolling this stuff on the ground is just like rolling paint on the wall. You want to have a good solid coating. Make sure to work your way around the room from one side to the other. You don’t to get stuck in the middle of the room surrounded by wet epoxy.
Let it Dry
Now all the hard parts are done. The floor is officially finished, but it isn’t finished smelling! It took about a week for the off gassing to stop and the smell to completely go away. Just let it dry for 2-5 days before walking and putting heavy things on the floor– like workbenches. Anything heavy can pull up the soft epoxy. I waited about 2 days before I started walking on it. It was definitely still soft. In some places you could even peel it with your fingernail. I would definitely wait a week bring your tools and stuff back into the room. There’s no need to chance it. You worked hard to get to this point, why ruin it?
After about a week, the floor with be hardened, durable, and shiny. I love the way mine turned out. It puts a hold new mood in the room. It actually turns it into a room rather than an unfinished area. I love it!
I hope this article helped show you how to finish your guitar workshop floor. Maybe I even convinced you to try this for yourself. You should. It’s easy and looks great. If you try it out, I hope yours turns out just as awesome as mine did.